Pages

What is Mock Server and How to Mock a server for API Tests?


What is Mock Server and How to Mock a server for API Tests?

Postman is one of the most versatile tools for API testing and its automation. In this tutorial we are going to understand the implementation of API testing using Postman as a beginner. Then in upcoming blogs, I’ll be posting blogs for “How I am using Postman for API testing, mocking, documenting, performance, interception and automation” So subscribe for email notification.

Let’s start with first downloading and installing the Postman tool in our machines: Postman is available for Windows, Linux, and Mac as a standalone application. You can install the application in two ways.

Windows machine download link: https://dl-agent.pstmn.io/download/latest/win64 (64 bit)

Mac OS machine download link: https://dl-agent.pstmn.io/download/latest/osx_arm64 (Apple Chip)

Now follow the below steps:

  1. Click on the exe file to install it on the system. First, it will install the Postman application
  2. There are no further steps for installing. After completion, it will automatically start opening the Postman tool
  3. You might need to create a new account, for first time users and use your google account for the sign-up process.


What is a mock server?

It is just a fake server that is simulated to work as a real server so that we can test our APIs and check the response or errors. This server is set up in such a way that we get a particular response for a particular request that we desire to see.

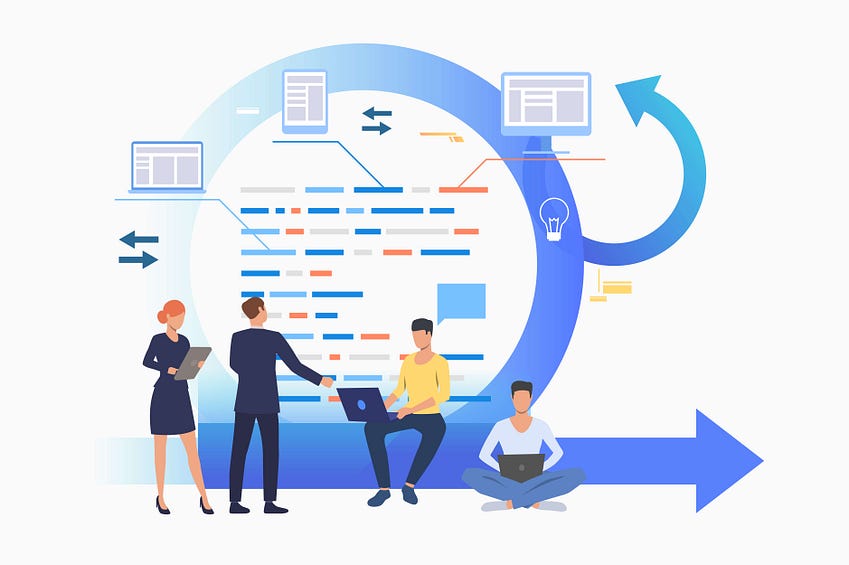
In Agile methodology, in this method, testing and development goes side by side. For this, a tester needs to have the same requirement as the developer to work simultaneously. For which you need a mock server.

What are some advantages of Mocking a server?

  1. To separate the system under test from third party services, such as APIs, you may laugh at a server. Therefore these tests will concentrate on how the SUT behaves and not be influenced by service availability or performance.
  2. By using a mocked server you can control what kind of responses are sent to the SUT when testing is going on. This in turn lets us simulate situations like network error, timeout and unexpected response ensuring that SUT behaves correctly under such conditions.
  3. Network delays and dependencies on other systems are eliminated in mocked servers making them usually faster and more reliable than servers. The reason why this is done is that it increases test execution speed, enhances efficiency hence allowing for quick feedback cycles and testing runs.
  4. When you mock a server behavior during tests can be created which makes it easier to reproduce scenarios accurately. Since one can re-create the circumstances that led to failure, this consistency is very important for fault diagnosis and repair purposes.
  5. This freedom allows for progress and experimentation as teams have ability to establish and manage their simulated servers without relying on external factors being ready or up-to-date thus mocking a server enables automation teams to operate independently of teams or services.

A front-end developer needs to develop the UI for which he must know the responses he will get. For the same he cannot wait until the APIs are on the server, so he uses the mock server in order to achieve the same and save time.

I guess now you must have known that a mock server is a pretty important feature for a tester. It is very helpful in both the development and test phases of software. Continuing for the same we will now proceed to create our first mock server.

How to create a mock server in Postman?

Step — 1


Step — 2

Once you click on create mock serve, you’ll move to a new screen. As shown below. In which you need enter

  1. Request Method
  2. Request URL
  3. Response Code expected
  4. Response Body expected

You can use below data for reference and setup your first mock server

1st Request

  1. Method — POST
  2. Request URL: https://reqres.in/api/users
  3. Response Code: 201
  4. Response Body: {
        "name": "morpheus",
        "job": "leader",
        "id": "517",
        "createdAt": "2024-04-23T20:12:24.523Z"
    }

2nd Request

  1. Method — GET
  2. Request URL: https://reqres.in/api/users?page=2
  3. Response Code: 200
  4. Response Body: {
        "page": 2,
        "per_page": 6,
        "total": 12,
        "total_pages": 2,
        "data": [
            {
                "id": 7,
                "email": "michael.lawson@reqres.in",
                "first_name": "Michael",
                "last_name": "Lawson",
                "avatar": "https://reqres.in/img/faces/7-image.jpg"
            },
            {
                "id": 8,
                "email": "lindsay.ferguson@reqres.in",
                "first_name": "Lindsay",
                "last_name": "Ferguson",
                "avatar": "https://reqres.in/img/faces/8-image.jpg"
            },
            {
                "id": 9,
                "email": "tobias.funke@reqres.in",
                "first_name": "Tobias",
                "last_name": "Funke",
                "avatar": "https://reqres.in/img/faces/9-image.jpg"
            },
            {
                "id": 10,
                "email": "byron.fields@reqres.in",
                "first_name": "Byron",
                "last_name": "Fields",
                "avatar": "https://reqres.in/img/faces/10-image.jpg"
            },
            {
                "id": 11,
                "email": "george.edwards@reqres.in",
                "first_name": "George",
                "last_name": "Edwards",
                "avatar": "https://reqres.in/img/faces/11-image.jpg"
            },
            {
                "id": 12,
                "email": "rachel.howell@reqres.in",
                "first_name": "Rachel",
                "last_name": "Howell",
                "avatar": "https://reqres.in/img/faces/12-image.jpg"
            }
        ],
        "support": {
            "url": "https://reqres.in/#support-heading",
            "text": "To keep ReqRes free, contributions towards server costs are appreciated!"
        }
    }


Once done, Now click on the NEXT button. You can set up an Environment and set Mock Server Name.

If required in the dropdown for “Simulate a fixed network delay” -> You can enter network conditions to test. We can do this later too, So I am not going to set it right now.

We will create a new Postman Env. now. Follow below steps:

  1. In the sidebar click on “Environments”
  2. Click on the “+” symbol and create a new Env.
  3. Now enter the variable name, values as shown below in screenshot
  4. Then click save or “Ctrl+S” on windows/ “Command+S” on Mac


Now go back to your mock server tab and select the values as shown below in screenshot


Once, mock server is created, you’ll get a screen like below and now we are ready to start the Mock API Testing


Use the URL which was generated for your mock server and then we can start testing

As soon as you close the panel, you will see that a new collection with the same name has been created with your APIs that you entered.


Performance Testing Terminologies for every QA/Test Automation


Performance Testing Terminologies for every QA/Test Automation

If you are going to work for testing of a product then probably, performance testing is one of the most important aspect for it’s stability. As you might be aware, whenever there is a Live cricket/football match hosted on a OTT platform or YouTube then how come so many users simultaneously watch it? Moreover another interesting example can be festival sales on Amazon.com. The footfall of users massively increases during these times.

Yes, that is where we need to performance test our application to make sure the load on application is managed effectively none of the users face any downtime. So keeping this in context I have attached a below most useful terms that we should understand as a QA/Test Automation/SDET to effectively measure and enhance the performance our applications tested.

Latency : is the delay in network communication. It shows the time that data takes to transfer across the network. Networks with a longer delay or lag have high latency, while those with fast response times have lower latency.

Latency determines the delay that a user experiences when they send or receive data from the network. You can measure network latency by measuring ping time. This process is where you transmit a small data packet and receive confirmation that it arrived.

Throughput : refers to the average volume of data that can actually pass through the network over a specific time. It indicates the number of data packets that arrive at their destinations successfully and the data packet loss.

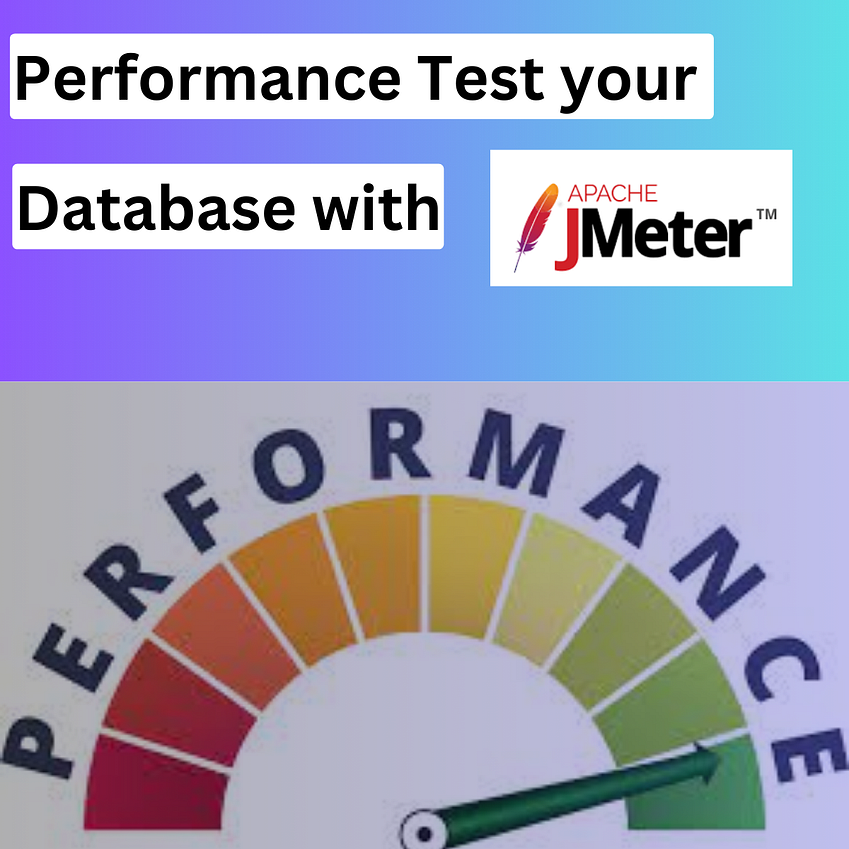
Throughput determines the number of users that can access the network at the same time. You can measure throughput either with network testing tools or manually. Use tools like JMeter, Postman, LoadRunner, Locust, Gatling these are quite simple to setup and can be easily used to measure.

Important A network with low throughput and high latency struggles to send and process high data volume, which results in congestion and poor application performance. In contrast, a network with high throughput and low latency is responsive and efficient. Users experience improved performance and increased satisfaction.

Response time : is the total time taken between the moment a user or client sends a request to the system or application and the moment they receive a response. Response time can be influenced by various factors, such as latency, server capacity, database queries, code efficiency, caching, and concurrency (explained below).

Caching : is a technique that improves the speed and performance of your website by storing frequently used data or resources in a fast and accessible location such as browser or caching server etc.

response time of 2 seconds may be acceptable for a web page, but unacceptable for a real-time application. Similarly, a response time of 10 milliseconds may be impressive for a database query, but insignificant for a video streaming service.

Concurrent Users : Multiple users using an application at the same time. To simulate real time performance test scenarios, we need to have concurrency checks. Making sure application can manage and provides correct responses.

Virtual Users : If we use some performance testing tools such as JMeter, Locust, Postman etc. we can load virtual users. Basically it means a user which is not real but is used to replicate real user actions on an application for performance checks. Virtual users can be described as Threads. Multi-Threads are used to make concurrency checks.

Transaction Per Seconds : measurement is used to calculate the performance of systems that handle routine transactions and record-keeping.

TPS can be calculated with the formula:

T ÷ S = TPS

Where:
T = Number of transactions
S = Number of seconds
TPS = Transactions per second

Ramp up period : The Ramp Up Time property represents the delay between start of the test until all virtual users are running. This is independent of the Duration setting and tells how long to take to “ramp-up” to the full number of Virtual Users chosen.

Ramp Up Time needs to be long enough to avoid too large a work-load at the start of a test, and short enough that the last virtual users start running before the first ones finish (unless one wants that to happen). Probably it should simulate a real time condition but it becomes to difficult to manage during tests hence, try different combinations.

Ramp down period : While ramp-up tests are perfect before peak time as the app launches, ramp-down looks at data when the peak hour ends. During that time, you often see drops in the concurrent numbers. Ramp-down will look at the same type of speed delay, only that this time assesses that drop.

This can be useful when we are variety of scenarios like, we increased the number of users for certain time period and then reduced. After some time we again increase the users. This make sure the application is responding correctly in variety of loads. This can also be called as Endurance tests. We will be discussing upcoming.

Advantages of Ramp up and down periods:

  1. Utilizing Variable Load Simulations
  2. Monitoring Resource Utilization
  3. Assessing System Recovery

Think Time : a real-world user takes time to read the content of a web page or fill in the details on a web form. Such activities create a gap between the two actions of a user. Think time simulates the same time gap by adding a delay between two transactions.

Protocol : the method of communication between a client and the server. Such as HTTP, TCP etc.

Stress tests : measures software on its robustness and error handling capabilities under extremely heavy load conditions and ensuring that software doesn’t crash under crunch situations. It can also help us to determine the breakpoint of our applications, beyond which application might start throwing error.

Why do we conduct it? : checks whether the system demonstrates effective error management under extreme conditions

Endurance tests : the load which we usually get on peak time usage of our production application are kept on application in a different environment but for extended duration of time. Just to make sure if application gets some unusual usage statistics then it should be able manage it effectively.

Volume tests : Applying huge amount of data for tests, such as artificially increasing database size. Using volume tests we can detect the impact on response time and system behavior can be studied when exposed to a high volume of data.

Why conduct Volume tests : Check system performance with increasing volumes of data in the database

  • To identify the problem that occur with large amount of data
  • To figure out the point at which the stability of the system degrades
  • Helps to identify the capacity of the system or application — normal and heavy volume

Baseline : While establishing the performance tests, we need to have metric before hand using which can start the testing. Now this metric can contain data for current performance of application or minimum threshold which our application should meet. This metric can be described as Baseline.

Benchmarking: Once we establish our baseline now to improve the performance of system we can start benchmarking by performing different load tests as described above or we can start network throttling (meaning making network conditions worse slowly). Benchmarking will only help us to measure by how much our system is improved or degraded during particular performance tests.

Testing Microservices vs Monolithic

Testing Microservices vs Monolithic


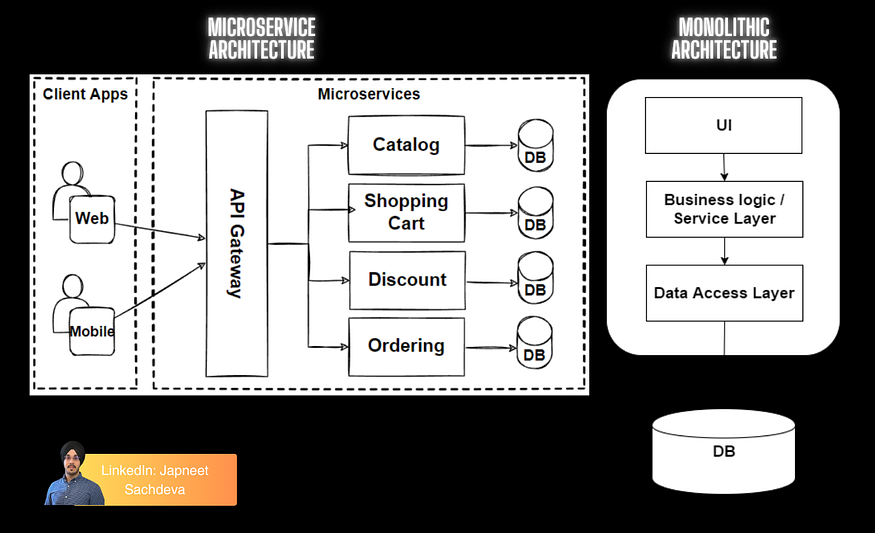
Monolithic: is a software application that typically contains all the code in a single code base. The server-side application, the API endpoints, business logic, data model and background jobs, etc., are all defined in the same codebase. This means that if developers want to make any changes or updates, they need to build and deploy the entire stack all at once.

As can be seen in infographic above each component like UI, Business logic and data storage, access are kept within single large component. Which means the entire codebase resides together.

Advantages:

  • The development phase is straight forward.
  • End-to-End testing can be easily implemented using tools like Selenium & PlayWright etc.
  • The deployment package to the server is very simple to deploy.
  • It is easy to scale the instances horizontally by running multiple copies behind a load balancer.

Disadvantages:

  • Low Flexibility as tech stack once selected cannot be changed or updated later on, as it becomes really challenging.
  • Deployment becomes challenging as the whole application needs a single package creation and deployment. Even for small updates.
  • Low reliability, cause if one service goes down entire application can be hampered.
  • Scalability issue: In 2011, Uber, with UberBLACK as its sole product in San Francisco, ran on a monolithic architecture. As Uber’s services expanded globally, they started facing integration and scalability challenges in their codebase. By 2015, these complexities prompted Uber to follow tech giants like Amazon, Netflix, SoundCloud, and Twitter, transitioning from Monolithic to Microservices Architecture.

Become a successful Test Architect with Full Stack QA: Link

Testing Strategy for Monolithic System:

Automated Tests using regression testing can be helpful for catching early stage bugs

End to end testing is the most suitable aspect for Monolithic based applications

API & Database tests can also be really useful in such cases as the whole application is one and data creation, using same data for further testing can be easily integrated in automated tests. Integration tests can be easily conducted

Performance tests are really crucial cause if one part of application crashes then whole application can face downtime

Major drawback is isolated component testing is really challenging to conduct

Microservices: splitting the application into small services, and these services are independent of each other (loosely coupled). Working with microservices also demands more experience and seniority from the development team.

As shown in the image above, the UI connects with one or more microservices, and these microservices can communicate with each other by synchronous or asynchronous communication. Also each microservice has it’s own database.

It’s also possible to use an API Gateway for managing the incoming and outgoing API requests. What is API Gateway?

An API gateway acts as a single entry point for clients to access various backend services in a microservices architecture. It sits between clients and services, handling tasks like:

  • Routing requests to the appropriate backend service based on the URL and method.
  • Security enforcement like authentication and authorization.
  • Traffic management to handle scaling and load distribution.
  • Monitoring API usage and performance.

Testing API Gateways:

  • When to test? Throughout the development lifecycle:
  • Unit tests: During development to verify individual components like request routing and response formatting.
  • Integration tests: To ensure proper interaction between the API gateway and backend services.
  • Functional tests: To validate overall API functionality from a client’s perspective.
  • Security tests: To identify and address potential vulnerabilities.
  • Performance tests: To assess the API’s ability to handle expected load.

Tools like Postman, Swagger, JMeter etc. can be used.

Crack test automation interviews using Java: Link

Advantages of Microservices:

  • Flexibility to scale any service as required
  • Each service can be updated anytime and deployed
  • Less or no downtime if one of the service is not working
  • Easier to understand and implement as codebase remains comparatively tight

Disadvantages:

  • Data consistency becomes challenging to maintain
  • Debugging during errors requires drilling through logs
  • Automated deployments are really important for microservices
  • Async communication can become challenging to maintain

Testing Strategies:

Automated Tests using regression testing can be helpful for catching early stage bugs

Major Advantage: Isolated component testing is very easy to conduct

Contract Testing: Thorough API & Database tests can also be really useful in such cases as the whole application is one and data creation, using same data for further testing can be easily integrated in automated tests. But integration tests can be challenging to setup.

Performance tests are really crucial cause if one part of application crashes then whole application can face downtime

Major drawback End to end testing is the most suitable aspect for Monolithic based applications

Testing Microservices vs Monolithic | by Japneet Sachdeva | Feb, 2024 | Medium

Get unlimited access to the best of Medium for less than $1/week.

Testing Microservices vs Monolithic

Japneet Sachdeva

4 min readFeb 27, 2024

Understanding systems or applications from architectural perspective gives really improved approach of testing for testers. Now as world is moving towards using AI for our common needs and reducing our efforts. We need to improve ourselves in Higher Level and Lower Level system understanding.

So today, as part of this I am going to provide approach and architecture understanding of Higher Level Systems. Such as Microservices and Monolithic architectures. We will discuss about How these architectures are different and how to test it?

Take a look at my course with E-books created specifically for SDET and future SDET managers: Link

Monolithic: is a software application that typically contains all the code in a single code base. The server-side application, the API endpoints, business logic, data model and background jobs, etc., are all defined in the same codebase. This means that if developers want to make any changes or updates, they need to build and deploy the entire stack all at once.

As can be seen in infographic above each component like UI, Business logic and data storage, access are kept within single large component. Which means the entire codebase resides together.

Advantages:

  • The development phase is straight forward.
  • End-to-End testing can be easily implemented using tools like Selenium & PlayWright etc.
  • The deployment package to the server is very simple to deploy.
  • It is easy to scale the instances horizontally by running multiple copies behind a load balancer.

Disadvantages:

  • Low Flexibility as tech stack once selected cannot be changed or updated later on, as it becomes really challenging.
  • Deployment becomes challenging as the whole application needs a single package creation and deployment. Even for small updates.
  • Low reliability, cause if one service goes down entire application can be hampered.
  • Scalability issue: In 2011, Uber, with UberBLACK as its sole product in San Francisco, ran on a monolithic architecture. As Uber’s services expanded globally, they started facing integration and scalability challenges in their codebase. By 2015, these complexities prompted Uber to follow tech giants like Amazon, Netflix, SoundCloud, and Twitter, transitioning from Monolithic to Microservices Architecture.

Become a successful Test Architect with Full Stack QA: Link

Testing Strategy for Monolithic System:

Automated Tests using regression testing can be helpful for catching early stage bugs

End to end testing is the most suitable aspect for Monolithic based applications

API & Database tests can also be really useful in such cases as the whole application is one and data creation, using same data for further testing can be easily integrated in automated tests. Integration tests can be easily conducted

Performance tests are really crucial cause if one part of application crashes then whole application can face downtime

Major drawback is isolated component testing is really challenging to conduct

Microservices: splitting the application into small services, and these services are independent of each other (loosely coupled). Working with microservices also demands more experience and seniority from the development team.

As shown in the image above, the UI connects with one or more microservices, and these microservices can communicate with each other by synchronous or asynchronous communication. Also each microservice has it’s own database.

It’s also possible to use an API Gateway for managing the incoming and outgoing API requests. What is API Gateway?

An API gateway acts as a single entry point for clients to access various backend services in a microservices architecture. It sits between clients and services, handling tasks like:

  • Routing requests to the appropriate backend service based on the URL and method.
  • Security enforcement like authentication and authorization.
  • Traffic management to handle scaling and load distribution.
  • Monitoring API usage and performance.

Testing API Gateways:

  • When to test? Throughout the development lifecycle:
  • Unit tests: During development to verify individual components like request routing and response formatting.
  • Integration tests: To ensure proper interaction between the API gateway and backend services.
  • Functional tests: To validate overall API functionality from a client’s perspective.
  • Security tests: To identify and address potential vulnerabilities.
  • Performance tests: To assess the API’s ability to handle expected load.

Tools like Postman, Swagger, JMeter etc. can be used.

Crack test automation interviews using Java: Link

Advantages of Microservices:

  • Flexibility to scale any service as required
  • Each service can be updated anytime and deployed
  • Less or no downtime if one of the service is not working
  • Easier to understand and implement as codebase remains comparatively tight

Disadvantages:

  • Data consistency becomes challenging to maintain
  • Debugging during errors requires drilling through logs
  • Automated deployments are really important for microservices
  • Async communication can become challenging to maintain

Testing Strategies:

Automated Tests using regression testing can be helpful for catching early stage bugs

Major Advantage: Isolated component testing is very easy to conduct

Contract Testing: Thorough API & Database tests can also be really useful in such cases as the whole application is one and data creation, using same data for further testing can be easily integrated in automated tests. But integration tests can be challenging to setup.

Performance tests are really crucial cause if one part of application crashes then whole application can face downtime

Major drawback End to end testing is the most suitable aspect for Monolithic based applications

Quick releases of application can be done once testing phase is successful

@LambdaTest

-x-x-

If you are looking to build your career in QA/Test Automation/SDET then you can schedule a call with me here: https://topmate.io/japneet_sachdeva

Subscribe to my YouTube channel: https://www.youtube.com/@IamJapneetSachdeva

My LinkedIn for everyday new content: https://www.linkedin.com/in/japneet-sachdeva/

#japneetsachdeva

Japneet Sachdeva

Test Automation Engineer| My latest course: https://shorturl.at/muKT2